– Basic Level")
 Part 2")
 Part 1")


MacBooks are known for their smart and secure operating system. It has better picture quality and offers the best performance. It is also known for its low storage setback on the low-end models. You will always need to manage and recover storage space on your Mac. There are different methods to recover storage space on Mac and one of them is to delete duplicate photos.
What’s Cluttering Your Mac?
As and when you use your Mac, you accumulate a lot of clutter. You need to identify the root cause and declutter your Mac at regular intervals.
Unwanted Apps: Your Mac can be cluttered with lots of Apps. When you revisit all the installed apps, you will find some unused apps. You should regularly check for installed apps and figure out what can be removed. You can delete unwanted apps and regain storage space.
Cache & Cookies: Whenever you use an app or browse the internet, you accumulate a lot of app clutter. A lot of caches, cookies, junk files, temp files, and other clutter gets accumulated that needs to be removed. You can also automate the process with one of the Best Mac Cleaners.
Large Files: If you have stored some media files like video albums or movies, you will need to check them again. Sort files by size and delete all the seen movies and videos. Deleting movies will regain a lot of storage space.
Backup Files: Whenever you create a new backup, it doesn’t delete the old one. You should check all the backup files regularly and delete the old ones. Always ensure that the new backup file is created properly and saved before you delete the old one.
Duplicate Files: Duplicate photos are one of the most common reasons for clutter. We capture a lot of memories with our iPhone and then transfer them to our Mac. In the lure of the best selfie, we capture a lot of duplicate photos. There are different ways to delete duplicate photos from Mac.
How to Delete Duplicate Photos from Mac Library?
There are different ways to remove duplicate photos from the Mac library. A few of the best steps are as follows.
Remove Duplicate Photos on Mac Using the Photos App
The Photos App is the default photo viewer on your Mac. You can quickly preview all the photos on your Mac and easily eliminate duplicate photos. The Photos App can also identify newly added duplicate photos. You can sort all the photos by date and easily delete duplicate photos.
Step 1. Access the Photos App on your Mac.
Step 2. Go to the File menu and select the ‘New Smart Album’ option.
Step 3. Give a name to your smart folder and create a filter criterion.
Step 4. Select the pictures that you wish to delete.

Step 5. Right-click on any of the selected images and select Move to Bin. You can also hold down the Command key and click to get options.
Step 6. Once you get the popup, click on the Delete button to confirm the selection.
Step 7. Click on the Recently Delete tab in the left panel.
Step 8. Click on the Delete All button on the top right to permanently delete all the deleted images.
Use Inbuilt Duplicate Finder Option
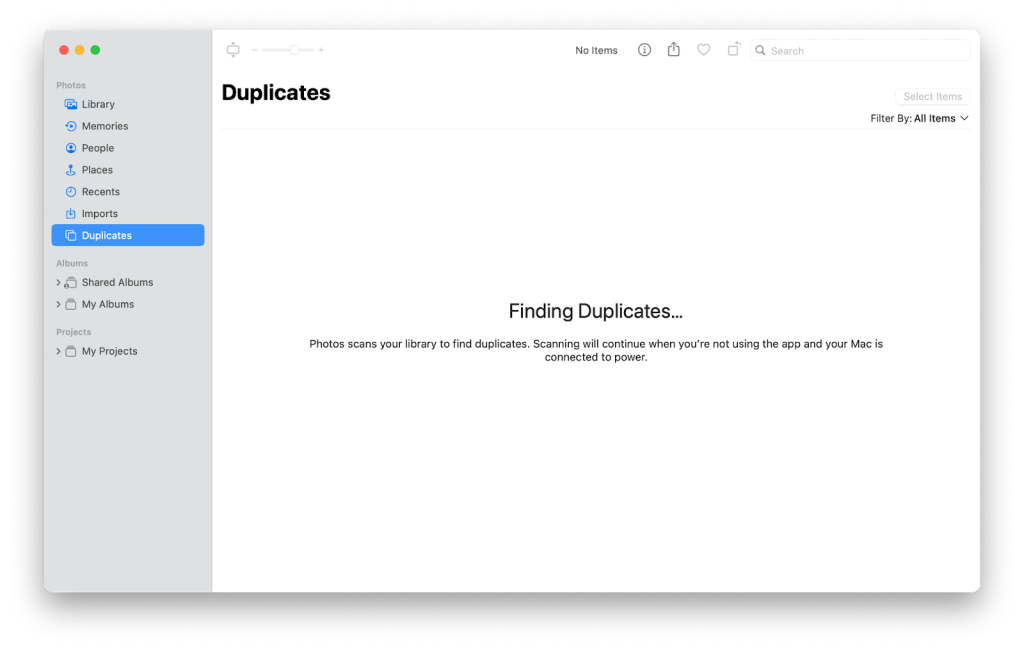
The latest versions of Mac come with an inbuilt Duplicate Finder option. You can quickly find all the duplicate photos and remove duplicate photos from Mac. You can try these steps to delete duplicate photos from your Mac.
Step 1. Access the Photos App on your Mac.
Step 2. Click on the Duplicates tab in the left panel to automatically find and list all the duplicate photos.
Step 3. You can select multiple photos by holding down the Command key and clicking on the duplicate photos.
Step 4. Click on the Merge [X] Items on the top. Select the Merge [X] Exact Copies and it will delete the duplicate photos from your library.
Step 5. Deleted photos are still there in your Recently Deleted folder. Click on the Recently Deleted folder and access all the duplicate photos.
Step 6. Click on the Recently Delete tab in the left panel.
Step 7. Click on the Delete All button on the top right to permanently delete all the deleted images.
Use the Finder option to Delete Duplicate Photos from Mac
Finder is the default explorer that will help you to view all the photos on your Mac. you can browse through the photos and select the ones that you wish to delete.
Step 1. Access the Finder Window.
Step 2. Click on the File menu and select the ‘New Smart Folder’ option.
Step 3. Click on ‘This Mac’ in the location to find the entire Mac.
Step 4. Click on the [+] icon at the top right corner to create a new filter.
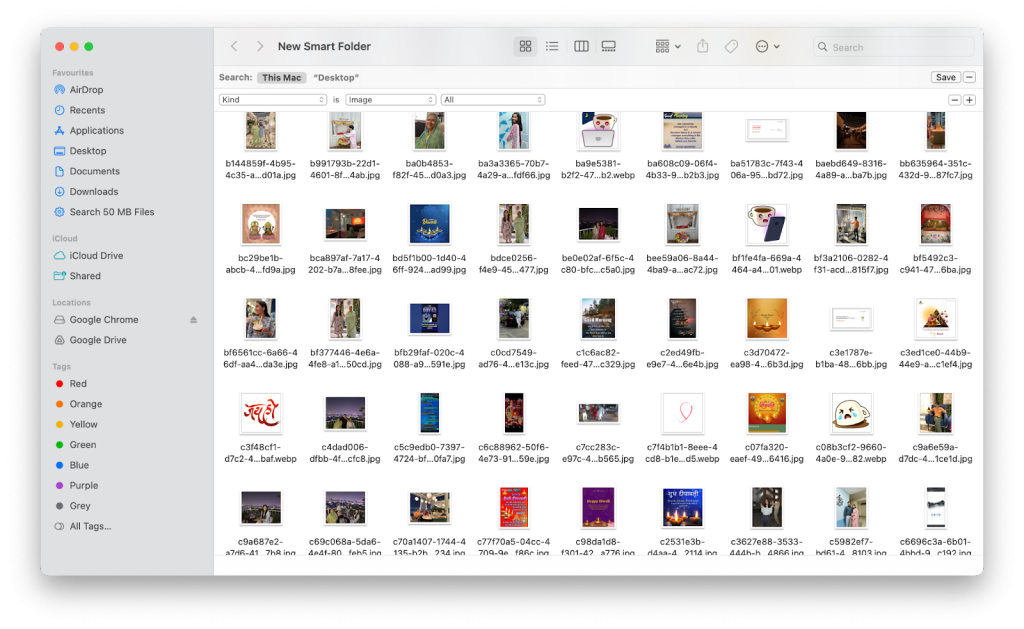
Step 5. Select Image as Kind and select All in the filter criteria.
Step 6. Click on the Name column to sort all the images by Name. It will help you to sort all the duplicate images with their found duplicates.
Step 7. Hold down the Command key and click to select the duplicate images.

Step 8. Right-click on any of the selected images and select Move to Bin. You can also hold down the Command key and click to get options.
Step 9. Once you get the popup, click on the Delete button to confirm the selection.
Step 10. Click on the Recently Delete tab in the left panel.
Step 11. Click on the Delete All button on the top right to permanently delete all the deleted images.
Use Duplicate Photos Fixer
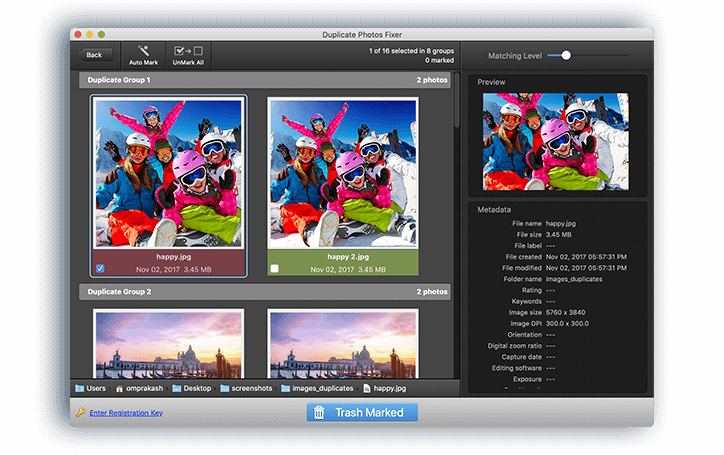
You can automate the process with the Best Duplicate Photos Fixer Pro for Mac. Duplicate Photos Fixer Pro can quickly find and list all the duplicate photos on your Mac. It has an advanced scan algorithm to scan and find all the duplicate images. It is compatible with all the latest versions of MacOS, Windows, Android, and iOS devices. You can quickly find and delete duplicate photos from your Mac and all other storage devices that you connect to your Mac.
Final Words
This article on how to delete duplicate photos from Mac has the best tips and tricks to quickly find and delete duplicate photos. These manual steps can quickly find and clean up duplicate photos from Mac. The manual process may not attain accuracy. You can make use of the best Duplicate Photos Fixer Pro app to automate the process and remove duplicate photos from your Mac. Keep it Clean!